

Arduino UNO kit
And then a diode, quartz, capacitors and a bed with combs.
It seems that all the parts are assembled and you can proceed, but I never saw the voltage stabilizer parts in the kit, which means that after assembly it will be possible to use the board only when connected to USB. Video assembly and tests.
And this is how the finished product looks like in comparison with the Arduino Uno/Nano That’s it with its installation on the board and I’ll start assembling the kit, then the USB connector and resistors.  After connecting to the computer, the board was immediately recognized by the operating system, without installing additional drivers, CH340 is a frequent guest on different boards, so most of the drivers for it are installed, if not, there is a link to the archive on the https://jiji.ng/12-bumpers/toyota-camry-2007 store page.
Some number of contact combs, screws and other things Inside the package: Four resistors at 1 kΩ, 1 at 10 kΩ, a 1n4148 diode and 4 LEDs. But from the point of view of assembling and using somewhere in the project, the set is not particularly important, the manufacturer did not bother not only with installing a power stabilizer, but even elementarily did not bring the controller’s power legs to separate contacts, of course, all this can be done, but I don’t think that it it’s worth it at the price of a ready-made Arduino. How many times have I not bought Chinese boards https://tonaton.ng/c_manufacturing-materials-and-tools always come with a flooded blink, except that mini without a blink come. All denominations are signed on the board, so assembly is easy, just install and solder almost without thinking. 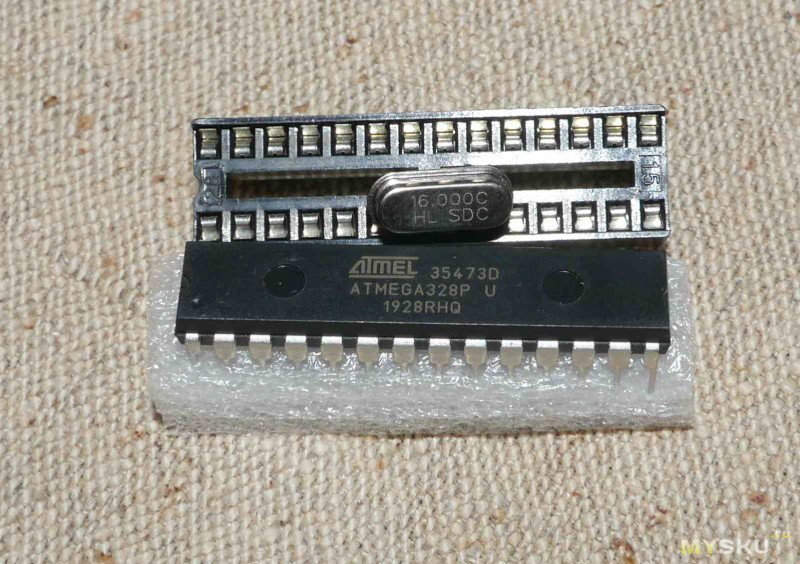 The only thing that made me think about it was the capacitors, only the places for installing load capacitors for 22p next to the quartz are signed on the board, but as it turned out, this is because all the others are of the same denomination, so the manufacturer decided not to bother with their marking on the board. Price with coupon BGKSTSCM $5.59 excluding shipping
And the only SMD chip in this set is CH340C Immediately after the power supply on the board, the LED L blinked, as promised on the website, the work began already Arudino’s classic Blink program. Atmega 328P microcontroller with crib and 16 MHz quartz A small conclusion: If you take this set as entertainment for an evening with a child, then it will probably be interesting, at least you can show that not only can you connect light bulbs to the arduino, but you can also assemble the arduino itself on occasion. From the point of view of assembling and then using it to teach a child, it may also be convenient that the controller is not soldered, so in which case it is easier to replace than to blow off the chip from the arduino. By the way, there was a slight inconsistency with the legs https://tonaton.com/s_25-sweatshirts, on one of the screws the thread pitch was not the same as in the bonk, so it twisted only one turn, I had to look for a replacement.
sketch using FastLED and connected 60 ws2812 LEDs, everything worked fine, so the whole kit is quite working. Seven capacitors. 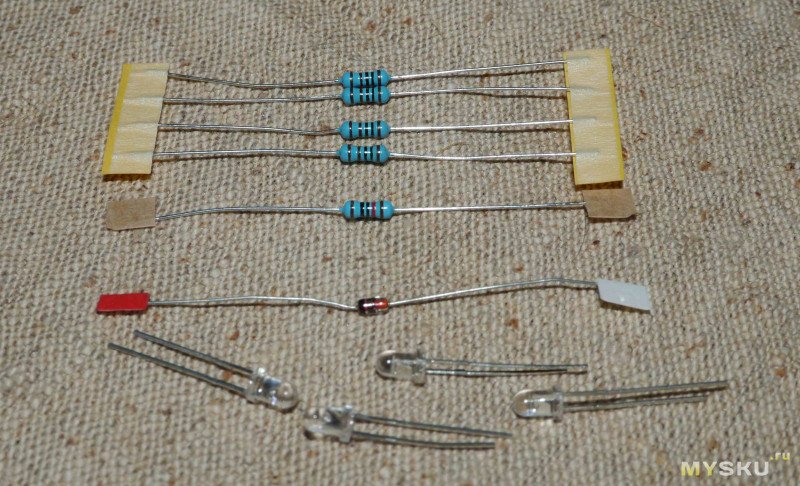
Arduino UNO kit

In order to test the board, we first filled it with the same blink, and then a blink with a shorter delay, the board accepted everything normally.
Completely finished board with installed legs and controller. The board of the future arduino, you can immediately see that it is narrower, but longer than the standard board from UNO

